Friday, December 30, 2011

Werewolves and Vampires, Oh My!

Mike and Alan from the Sac gamers hosted an awesome weird wars game today and invited Ethan and I to attend. Here are some shots at the start of the game. IMAG0178 
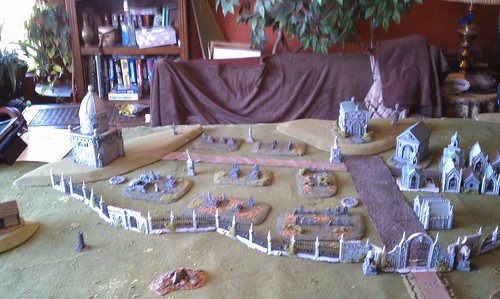
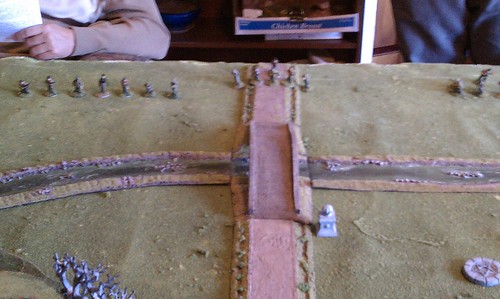
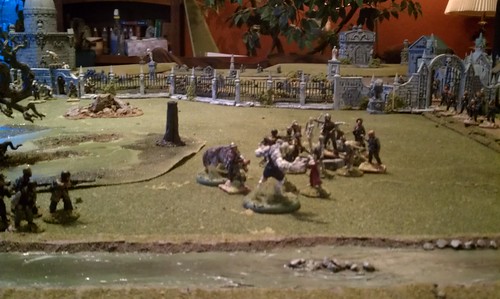
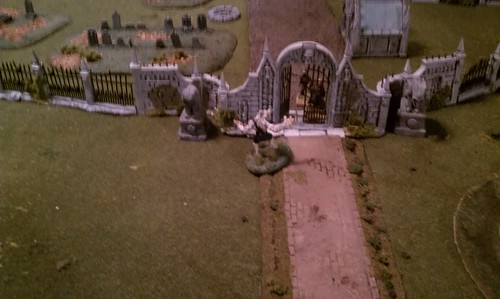
"A view from the German's edge of the game board. Hmmm...... I wonder what evil lurks in the cemetery? IMAG0179 
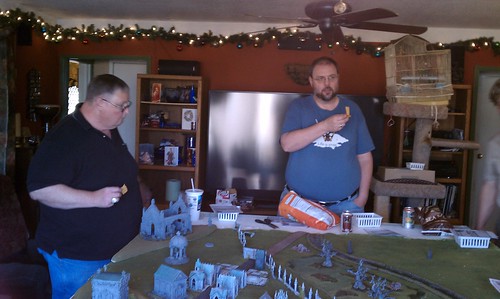
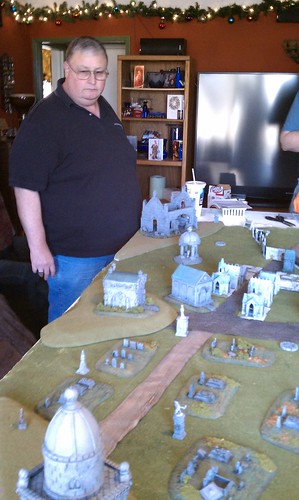
Gamers preparing for the assault. IMAG0180 "Did I see something's move in the mausoleum?" IMAG0181 
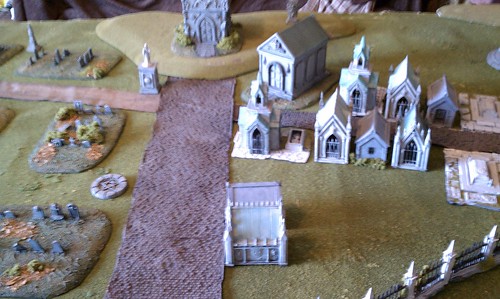
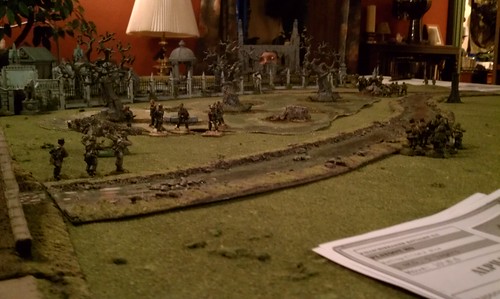
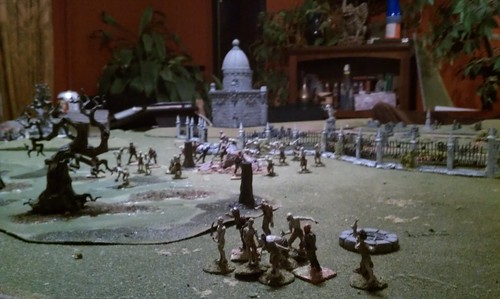
A shot of the center of the cemetery. IMAG0182 
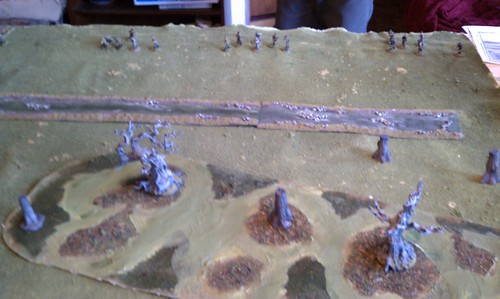
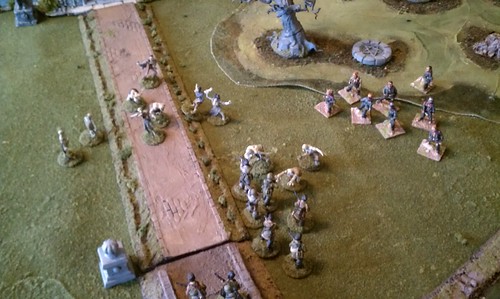
One half of the Germans set up and ready to go. I wonder why there's a swamp here? IMAG0183 The center of the line led by the ferocious, if cautious, Alpha, with the Beta squad to the right. IMAG0185 
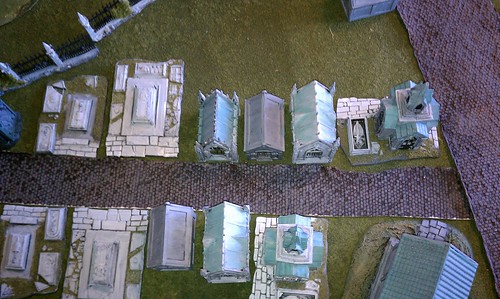
A close up of the cemetery.
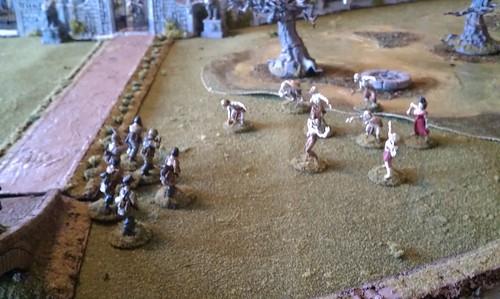
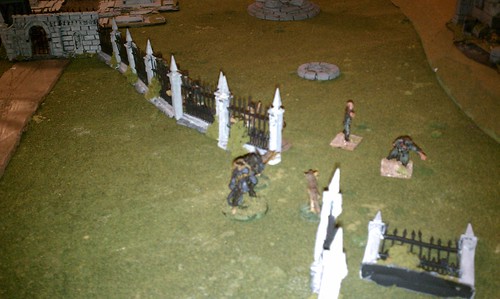
 IMAG0186 The assault begins. IMAG0187 
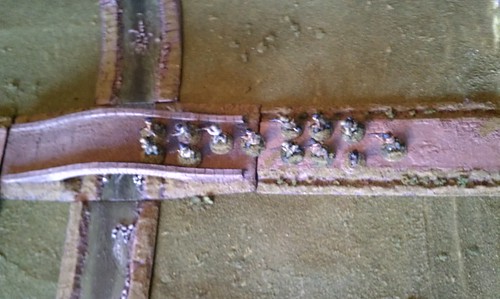
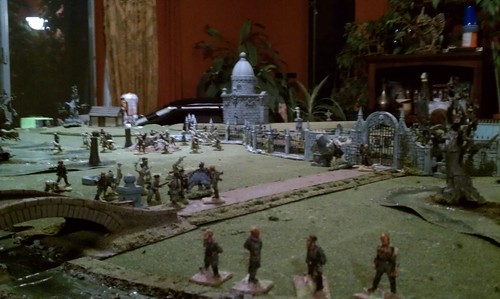
The line reaches the stream. IMAG0188 "Vas ist das?" IMAG0189 The specialist squad commanded by Nils supported by Alan's squad prepare to receive a charge by a zombie horde. Lots of zombies dominated this game. Lots and lots of zombies. Not that I'm bitter that my squad got blown to smithereens on turn two by a zombie wave. Nope not the tiniest bit bitter. IMAG0190 The sole survivor beta wolf supported by one of the support squads makes zombie chow. IMAG0191 "looks like the weapon crate sir!" IMAG0192 Zombie jamboree......Again.....Sigh....... IMAG0195 More zombies? Really? IMAG0196 "Look they have ammo over there. Quick double time!" IMAG0197 
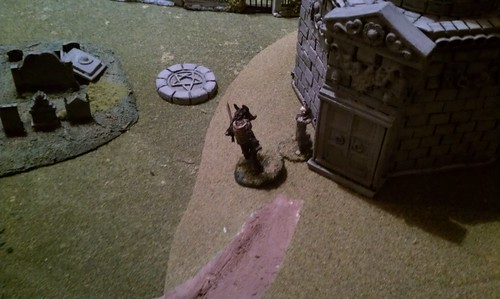
"Knock, knock. Anyone home?" IMAG0198 Zombies shuffle, but no brains are in sight..... Poor zombies. IMAG0198 
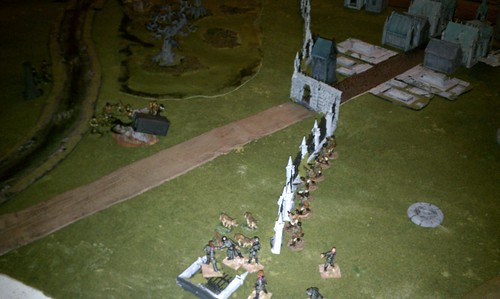
The Germans yield the left flank and sprint for bigger guns. Run Stanley run! IMAG0200 The last German unit fights off yet another zombie swarm. IMAG0202 The summoner and summoned fight off the Poles. IMAG0203 The summoner summons Krampus himself to bring the pain train to the vampires. IMAG0207 Krampus takes on the last vampire. All in all it was a great game. I want to thank Mike and Alan for hosting a great game.

Thursday, October 13, 2011

The Mysterious German U-Boat

I picked up a cool U-Boat off of eBay a few months back. As I'm almost done with my current crop of pulp figures, I decided it was time to start doing some research on this boat in preparation for assembling and painting it up.

I found a cool website (http://www.uboataces.com/) that lists a whole bunch of information about various U-Boats used during WWII, but I couldn't find any pictures of anything that resembled my boat. After a failed trip to the library and multiple failed online searches, I did what I had to do and turned to my gaming buds for help. John happily found a picture of the iconic WWII U-Boat, completely missing that mine resembled nothing like the picture. The rest of the group came up empty, when my main black belt search-fu master Nils came up with a picture from the original manufacturer of the sub (http://www.brigadegames.com/U-Boat-waterline-submarine-model--156_p_1689.html). She's a WWI sub. Doh! No wonder I was coming up empty. I was stuck looking for a WWII U-Boat.

Looking at the picture from Brigade Games, I noticed that there model has a deck gun. Feeling lucky, I sent them an email asking if I could purchase the deck gun from them. Being the top-notch lads that they are, the offered to send me the deck gun for just the cost of postage. Talk about great customer service! Of course, they also pointed out that they have several sets of U-Boat crew as well....Just when I thought I was done getting Germans....

http://www.brigadegames.com/U-Boat-Ships-Crew-5_p_356.html

http://www.brigadegames.com/U-Boat-Ships-Crew-I--WW2-5_p_358.html

http://www.brigadegames.com/U-Boat-Ships-Crew-II--WW2-5_p_359.html

Oh and they have the merchant sailors I've been looking for as well....Sigh....It looks like I might as well pull together a full order to properly outfit my sub.

The only part of my sub that I don't have down in my head yet is the railing around the conning tower. I'm still mulling over how to pull that off. Feel free to post any suggestions below.

Oh, here are some pictures of my sub. Do note that she's not assembled in the slightest.


I'm also still trying to figure out where to put the dive planes as this is a waterline model. I'm not totally convinced that I need to put them on. Thoughts?

Monday, October 3, 2011

Darryl's World

My buddy Daryl finally joined the modern age & started his own blog. Darryl's one amazing terrain builder, gamer & all around swell guy.

Go check it out.

http://a28mmbrain.blogspot.com/

Thursday, September 29, 2011

Savage Worlds / Savage Showdown Game

I hosted a small Savage Worlds / Showdown game last Saturday as part of my birthday. We had three heroes (wildcards in Savage parlance) looking for their friend, Dr. Zachariah Smith an eccentric inventor. Dr. Smith had moved his lab to the outskirts of town after his last experiment heavily damaged the Little Italy part of town. No one had heard from the good doctor for several weeks, so his closest friends set out to check up on him.

Unfortunately for our heroes, Archon Voss had heard of the doctor's accomplishments & decided to recruit the doctor to the Third Reich's cause. Archon Voss & his party arrived at the north end of the factory complex just as the heroes arrived to the South. A bloody gun battle ensued. Robots ran amuck. Heros dived through windows. Tennessee Buck & Archon Voss held a long pugilist competition, which ended with the Archon being shot & captured by our intrepid heroes.

It was a fun game. I learned a few lessons.

1. Massed rifle fire can be very nasty.

2. Cover is very important.

3. I need to remember to have heroes use their wild die when needed.

4. Bennies work nicely to correct problems.

5. I need to remember to do morale checks starting when a unit goes under 25% casualties.

6.  I need to read through the weird science & spell rules a bit more.

My overall impression of the game is that it plays well & pretty quickly. Aron & I were the only two who had ever played. Al & Carl had never played & picked it up very quickly.

I had two sides & one rogue force with a total of 20 models on a 30" x 30" board. The game felt like it moved pretty well & by the end it was really humming along. Now that I have a better feel for the rules, I'm pretty sure I could have more models on the board & not have the game bog down. All in all, I think I'm going to stay with Savage for now as it seems to meet what I'm looking for in pulp rules.

I have picked up a copy of Thrilling Tales, which has even more pulp goodness that I'm going to inflict. I also have some Mayan/Aztec paper buildings that are going to come in handy soon. I'm looking for some appropriate cars & trucks to round things out.

I'm going to work on a combat summary doc & rework the character & unit cards as well as plan the next episode.

Wednesday, September 14, 2011

Pirates! Pacificon 2011 Pictures

Here are some photos from the game I ran at Pacificon over Labor Day weekend with the aid of the inestimable Captain Foss and the indefatiguable Admiral Stanley.

Here is a shot from the start of the game.


Here is another shot


The Eye preparing to receive the dwarf assault.


Goblin captains plot their approach.

A brief break in the action. A young captain in training checks on the goblin deployment.


Another shot of the table, this time focused on the dwarf ships steaming to meet the goblin relief forces.
The dwarves have finally hit the beach.


Hard to port! Oops hard to starboard! Too late. All hands brace for impact! Two goblin captains make errant turns into each other or had the referee been paid off by the dwarves to slow the goblin advance?


What happend to all the of the dwarves and goblins on the island? A pile of bodies tells a sad tale.


Goblins prepare to leave the mother ship and row to shore to the island.


The S.S. Iron Pants steams past one goblin gunship. The dwarf galleas plots its bow cannon shot.


S.S Iron Pants lines up it's next shots, while two goblin subs slip past.


Oh no a squid! Who brought squid to this fight?


An ironclad steams to stop the green menace!


Ack another squid and two menacing pencils!

Thursday, September 1, 2011

Goblin Pirates

I've been working on a bunch of goblins for the Pirates! game I'm running with Stanley & Thomas on Saturday. Here's one of the units that I picked up on ebay.

This unit was mostly painted. I've only had to give them a thorough ink washing & a bit of drybrushing.  They aren't quite done yet, but they are close.


Monday, August 22, 2011

10mm Orc Fort---Part II

OK for those reading this time will seem to have flown into seconds, but this really took place over a week to get from where I left off in my first post to where we are in this post.

Thanks to some help from Thomas, the fort has gone from this:


To this:


Well, OK I did paint the rock wall black, but the real magic was done by Thomas using modeling paste for the dirt and mud sections and coarse pumice gel for the the grassy sections. That's all that's been done between those two photos. It's almost good enough to toss on the table, but not quite....


Here's a close up of the top hill and you can really see the texture Thomas added. Nice work Thomas and I've picked up a couple of tricks while watching the master at work in his workshop.

In this shot, I've painted the stakes around the perimeter and added a bit flocking to cover up the large gap between the two halves on the top hill. I've also started working up the stone wall a bit. The brave lads of Local 3255 are marching around the interior perimeter looking for interlopers.

Here's a close up shot.


Sunday afternoon was such a nice day out that I took the fort outside for some finishing touches, that and I'm still picking rocks out of the carpet in the family room from when I built the rock wall and decided that I had generated enough domestic issues for one week. :-)

I've worked up the grass colors, added some static grass and repainted for the third time the fighting step. I took some advice from Aron and I like how it's turned out. I'll leave you with two last shots of the fort. All that's left is to build a gatehouse, which will be a stand alone piece, and she's ready to go for the next round of fighting.


10mm Orc Fort---Part I

For those of you who don't know I'm somewhat into wargaming (mostly Pirates! and Warmaster lately) and have been playing a game called Warmaster by Games Workshop. In it, you take the part of a general of an army. Because no one makes tables large enough to really field an entire army of toy soldiers these soldiers are only 10mm high.

I've been playing Warmaster more actively for the last year and a half. A group of friends are playing a campaign wherein every player tries to play everyone else in one year. I'm proud to say that I'm doing much better this year than last year as I finally have my first win! Yep, I didn't win a single game last campaign, but I learned a lot and had fun with good friends.

OK, back to the fort. I really felt a strong desire to build some sort of terrain and as I'm not building any for my Pirates game at Pacificon this year, I decided that this looked like an easy project.

My buddy Nils (http://twotharksonecup.blogspot.com) pointed me to this cool 10mm iron age fort (http://miniaturesaga.blogspot.com/2011/08/dark-age-scots-hill-fort-part-i.html).

I thought, "this is really cool. This could easily be an orc fort or an ancients fort." With that in mind, I started this project only I wanted a full fort! How hard could it be? It's turned out to not be all that hard and with some good advice from great friends (Thomas, Aron and Peter) it's really looking great.


I thought I'd share this project and my enjoyment of miniature gaming with my friends at large.


So what is this picture? This is my initial sketch of the fort on the back of a Cheerios box. You can see three stands of a unit of orcs in the drawing as I wanted to make sure I got the scale right.

A ring fort typically was constructed in two levels. Here you can see the outer wall, typically an earth embankment topped with a wood pallisade wall. The second level of the fort will have a rough stone wall surrounding all but the ramp leading up to that level.

After sharing this photo with my gaming buddies, they pointed out that I should turn the ramp to the second hill so that my opponents can't charge straight up there so easily.


OK, here's the fort cut of styrofoam sheets. I had a couple of partial sheets leftover from a project last year. I used a foam cutter (looks like an old school D-cell flashlight with a wire loop. The toothpicks are holding the second hill on to the first till I glue it down.

To make the earth embankment and the stone wall I needed to use some clay. Peter Gross suggested I look into DAS air dry clay. As I have never used it before, I was a bit nervous committing to it on the actual project. I spent a nig...ht using it to make a low earth and log wall and a defended artillery position to test out the clay and the toothpicks I picked up.


Thanks to Ethan Miller I ended up buying way more clay than I needed, but somehow I think he and Erinn have plans for my extra clay.....


With the test out of the way, I made the earth embankment and the stone wall out of the DAS clay and spent way too long cutting up toothpicks to make the wood pallisade wall you see on top of the earth embankment in this photo. You ...can also see that I've rotated the ramp to the second hill. I should have rotated it 180 degrees, but I'm planning to cut this hill in half so I don't have to use the whole fort on the gaming table if I don't need to.


I've added the rocks (small railroad train gravel glued and mushed in) to the stone wall and I've added a fighting step with log walkway to the back of the pallisade wall as I realized my wall was too tall for my orcs to fight from.... Doh!

This is where things stand as of last night. I'm waiting for the clay to dry so I can glue down the logs (toothpicks) and texture the dirt areas of the fort.

I'll load more pictures as things progress.